On this page we will learn to manually install Drupal on your hosting account.
STEP 1
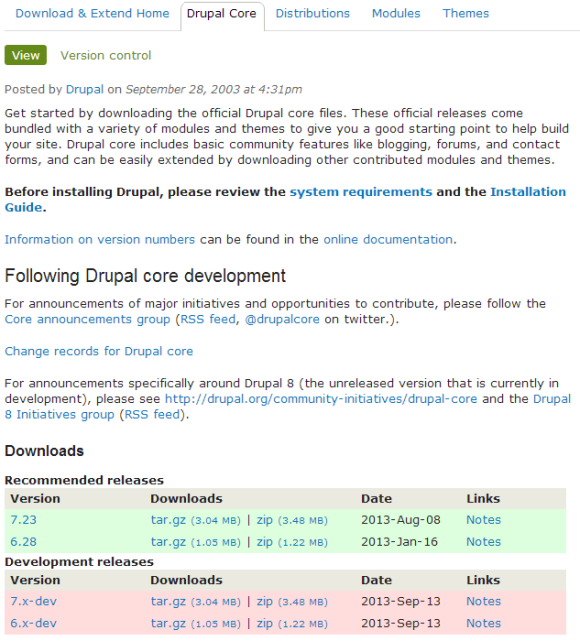
Download the latest Drupal version – The latest version of Drupal currently is 7.xx. One can use the currently stable versions for Drupal 6.xx and 7.xx from the Drupal’s Download page. Go to this page Download the latest copy of Drupal from Drupal site.
Save it on your computer’s drive so it is easily accessible when you need to upload it.
Extract the tar.gz file. This will create a folder in your download folder on your computer. We will later take the contents of this folder and upload that on the hosting site.
STEP 2
Now we need to create a new database. Please follow the steps on this page – Set up a New Database from the Cpanel.
STEP 3
In this we need to upload the Drupal code file to the Hosting site. We will use Filezilla to move the contents of the folder on the computer with Drupal files to public_html folder on the hosting site. This is the root director on the hosting site. (Using Filezilla to move files from your computer to the hosting site)
STEP 4
Preparing the filesystem – In the File Manager on the cpanel, you will need to navigate to /public_html/sites/default/ and copy default.settings.php into a new file settings.php. Also change the permissions of this file to 666. In addition set the permissions of /public_html/sites/default/ to 777. This will allow Drupal to create the files folder as owned by Apache user itself. Remember to set this back to 755 once installation is done.
STEP 5
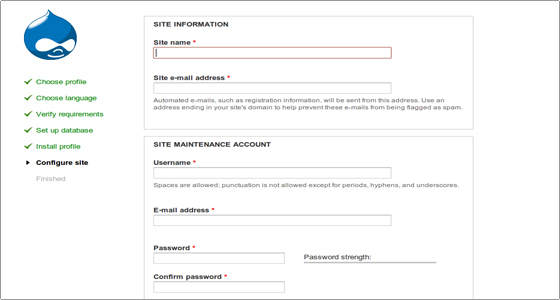
Drupal Installation – Once the files are moved to the webroot you can install Drupal by accessing the domain corresponding to your hosting account from a browser. Drupal Installer will guide you through the rest of the installation, as it will detect the installation files from the root directory, public_html. Through this process, you will have to enter the database details that were used when we created the database earlier. During this process you will need to input more information such as your site name, webmasters email id etc
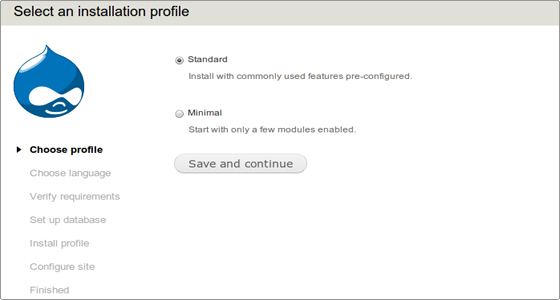
Navigate to the URL of your Drupal site and run the install.php file (for example http://yourdomainname.com/install.php). Pick the default profile option for your Drupal application.
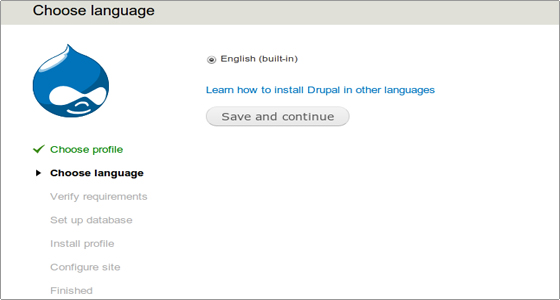
Pick English as the default language from the next screen.
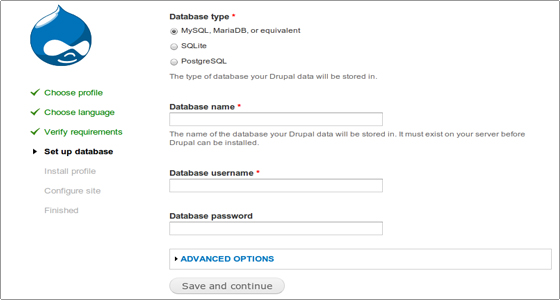
In the next screen, you need to enter the database details we had used to create the database earlier.
With this, the basic installation process is completed, and the basic site details are left.
This completes the site installation. Now you are ready to use your Drupal site. You will need to customize it with the installation of various modules and installing themes, as well as configuring them as per your taste.
.
