How to configure views on Drupal

Drupal is one of the most popular blogging and content management platforms available today. What makes Drupal so popular is that it allows users to create entire websites and blogs without the need to acquire information about complicated code. This allowed many amateurs with great content to enter the blogging sphere without the need to worry about the technical aspects of web design. Not only did Drupal arm private bloggers with the ability to share content, it also brought marketers with little to know web design experience into the mix giving them the opportunity to market their products online without having to incur unnecessary expenses of hiring a web developer.

Views is a module on Drupal which allows you to create complex layouts and lists. It is the second most downloaded module on Drupal since it allows users with a lot of flexibility.

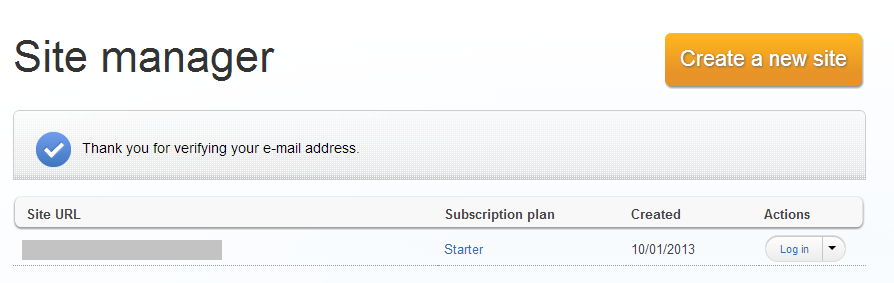
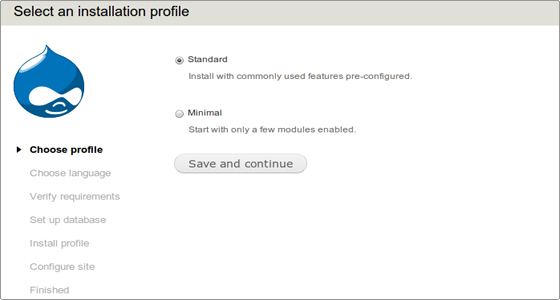
Login to the Dashboard

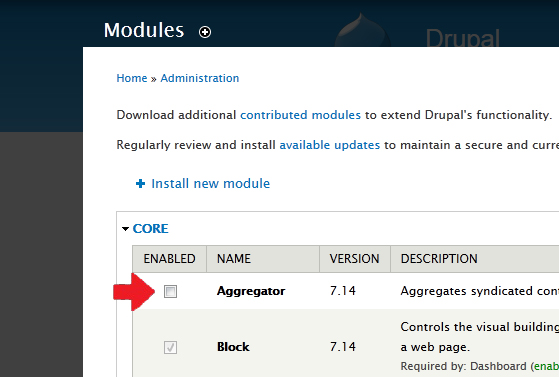
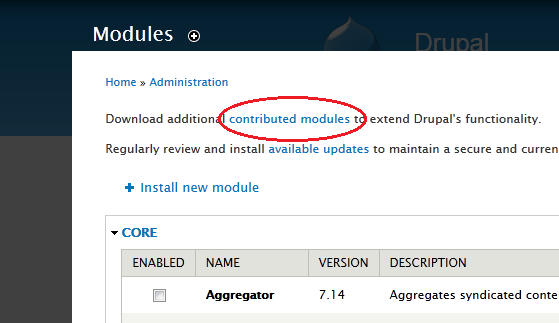
Log in to the Drupal site as admin and access the modules tab shown on top.

How to configure views on Drupal

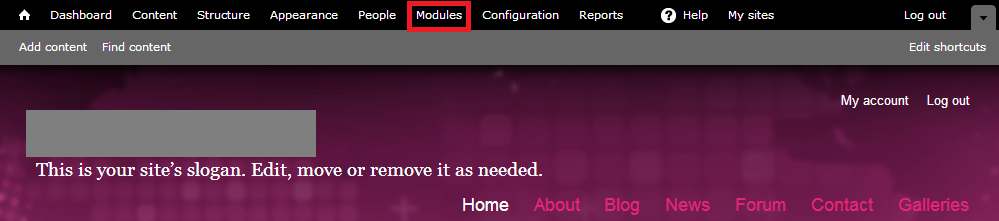
When the pop-up window appears, you will see a list of modules that have been preinstalled onto your blog.
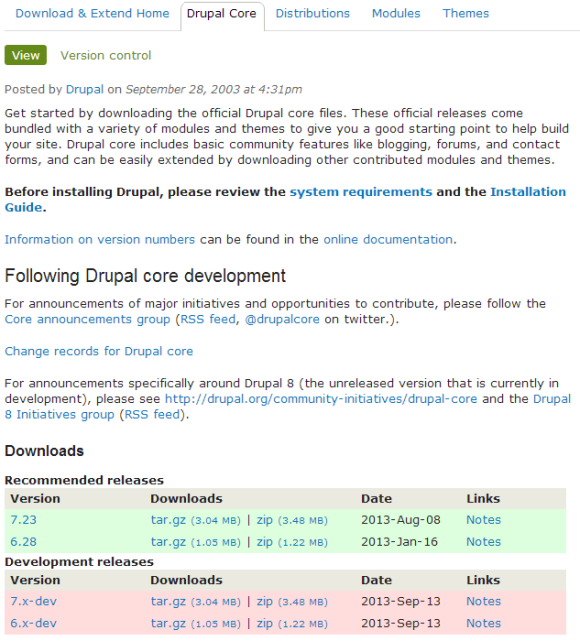
Download Views

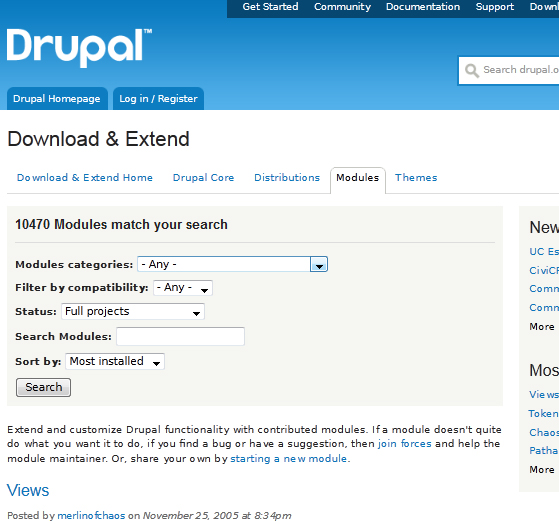
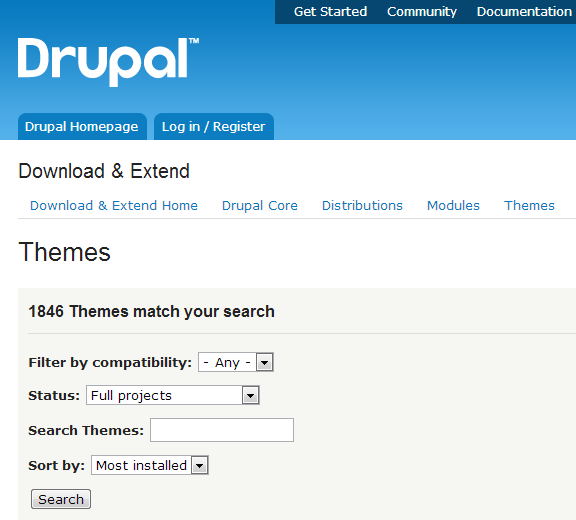
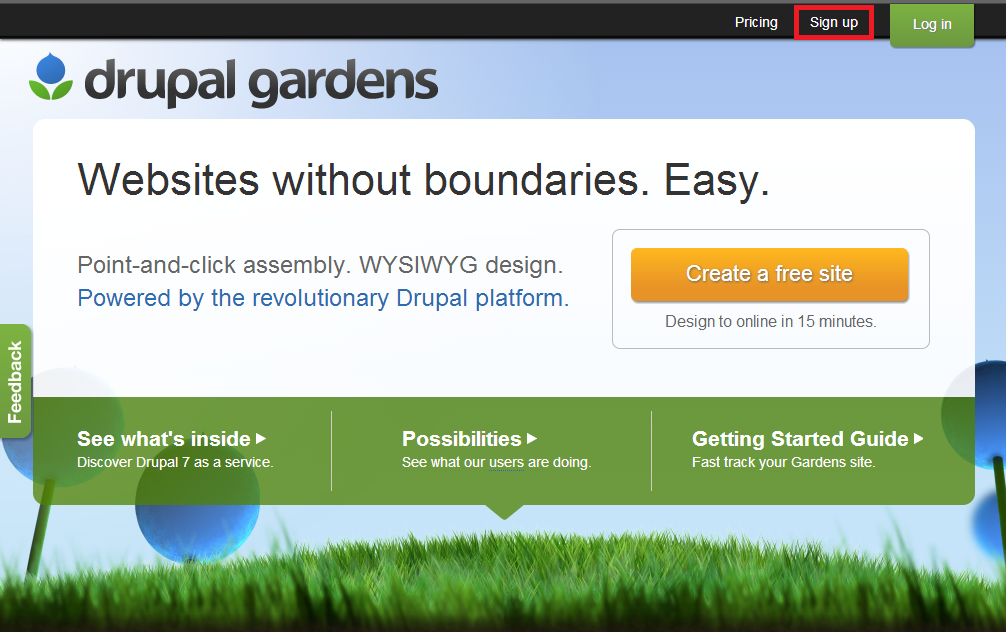
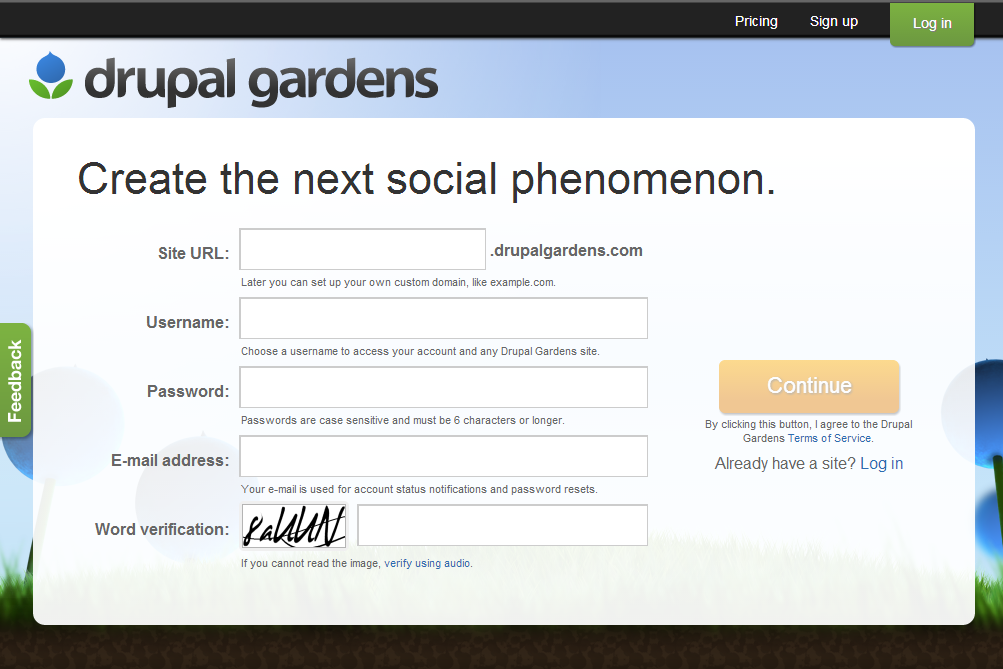
Visit Drupal.org and type views into the search box.

How to configure views on Drupal

How to configure views on Drupal

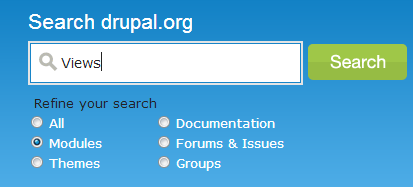
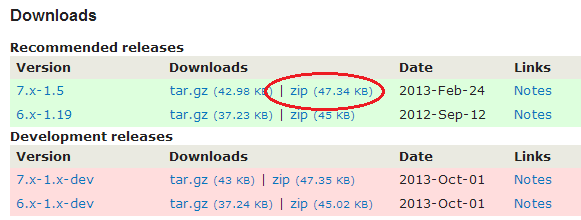
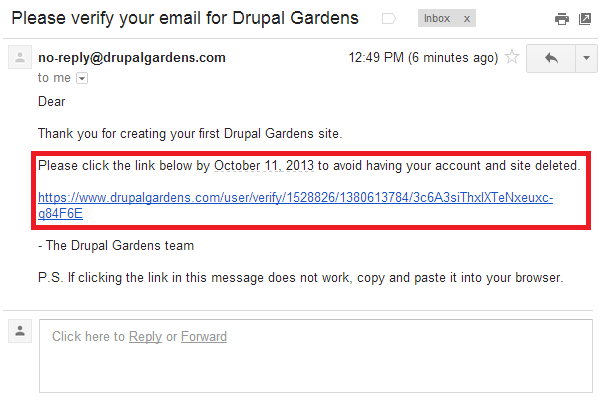
Download the relevant zipped file to your computer and log into your Drupal blog.
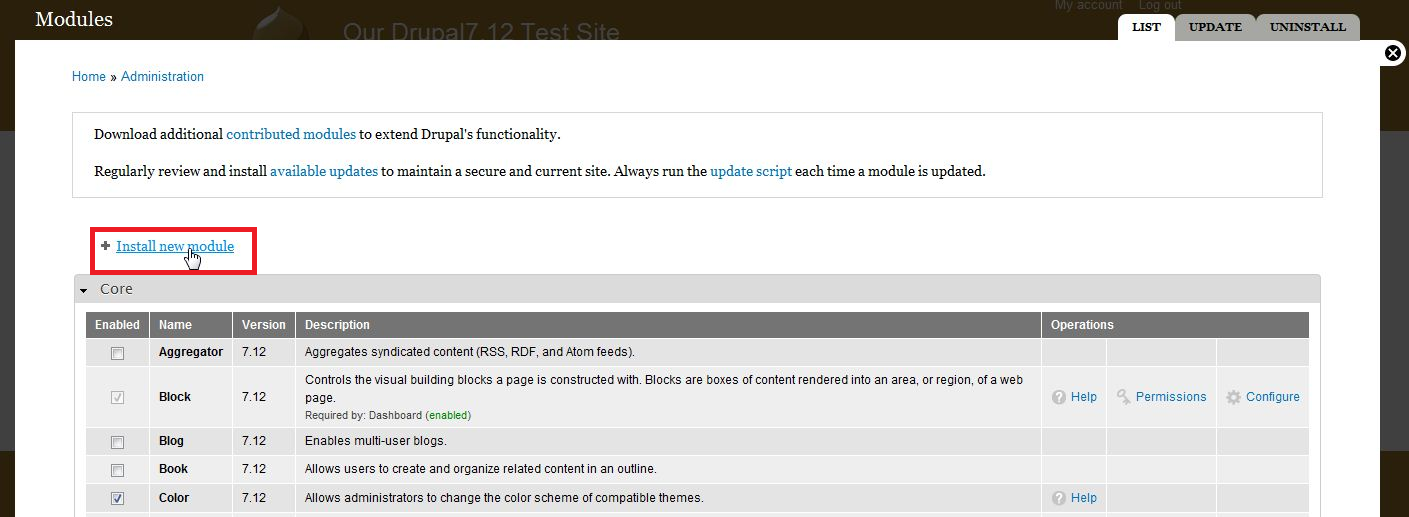
Adding a Module

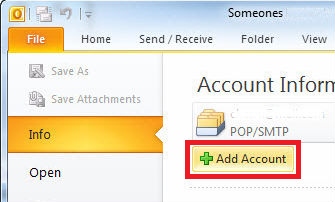
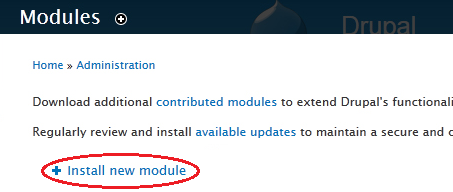
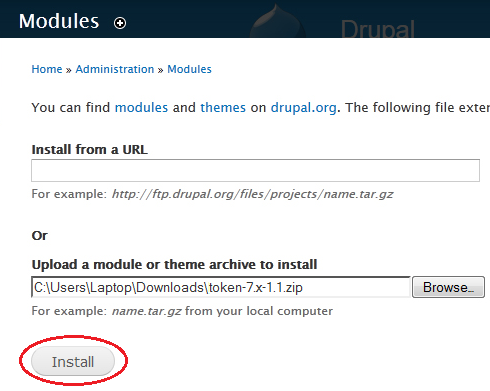
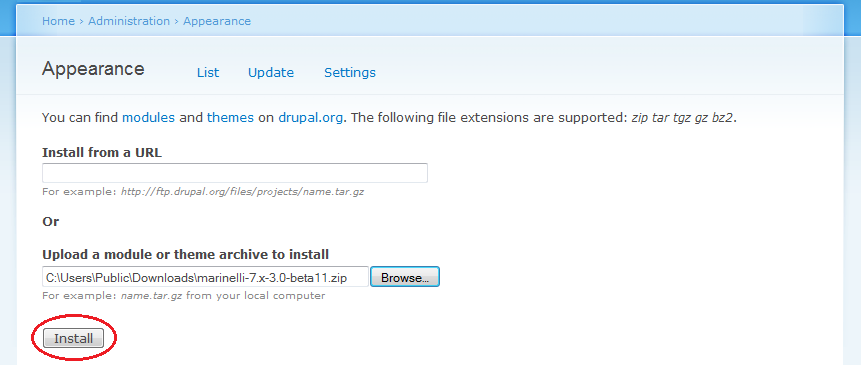
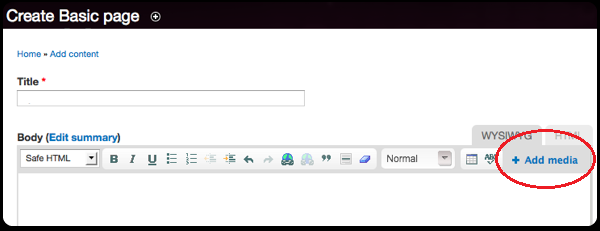
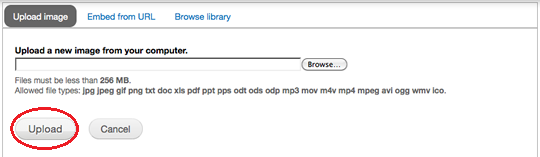
Click on the ‘Add New module’ option in order to proceed.

How to configure views on Drupal

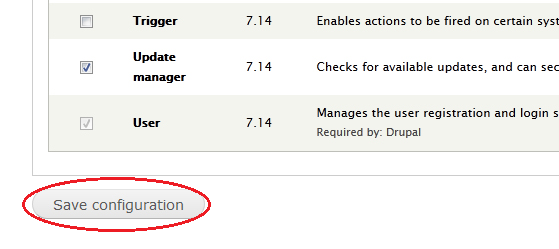
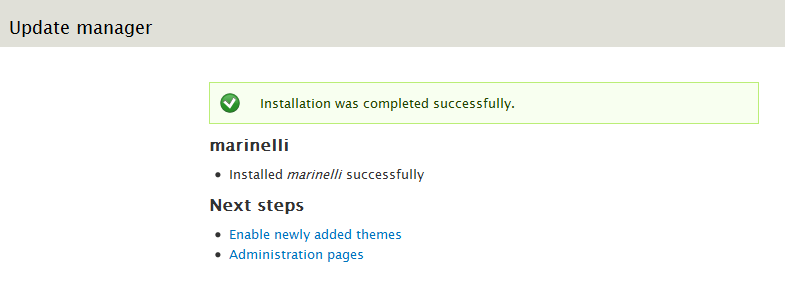
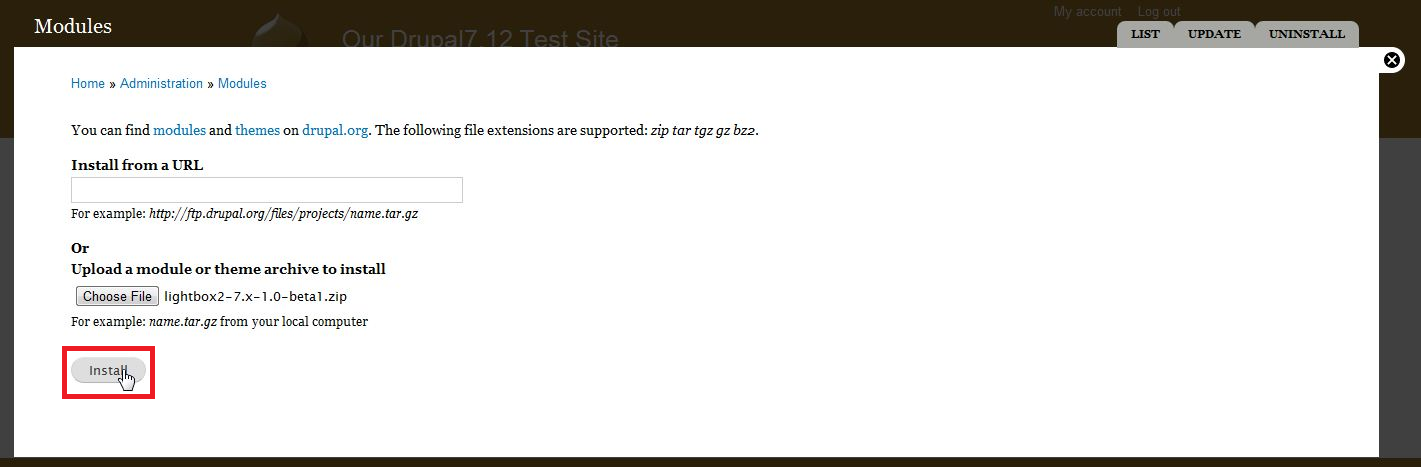
At this point you will be prompted to locate the zipped file you downloaded earlier and select it. Click on the ‘Install’ button to install it to your blog. Once installed enable it like you would any other module from the list in your dashboard.

How to configure views on Drupal

Configuring Views

The next step is to go back to your dashboard and click on ‘Structure’.

How to configure views on Drupal

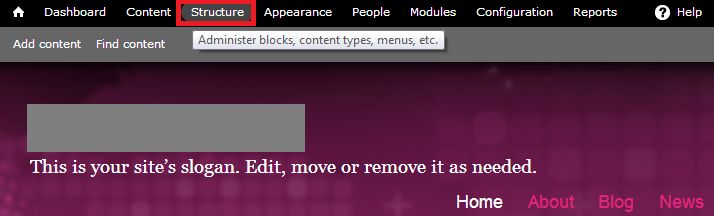
Under the structures tab you should be able to view a list options. Views should now be showing up as one of the options.

How to configure views on Drupal

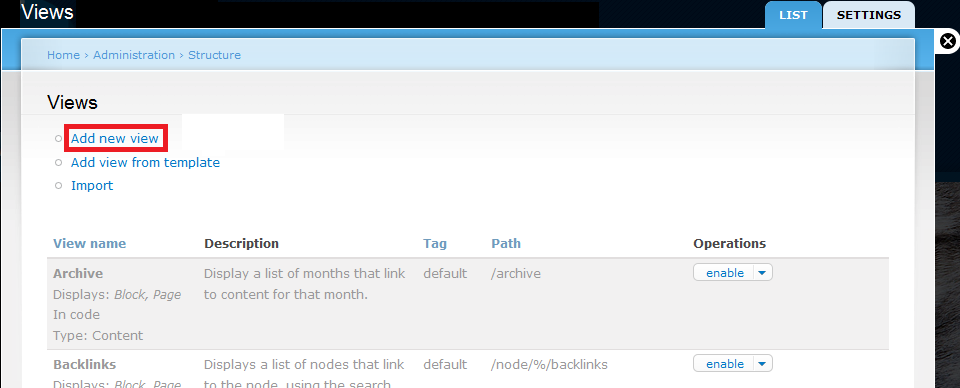
Once you’ve clicked on ‘Views’, select the ‘Add New View’ option that should be visible on the next page.

How to configure views on Drupal

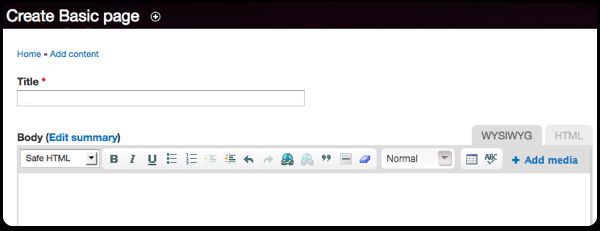
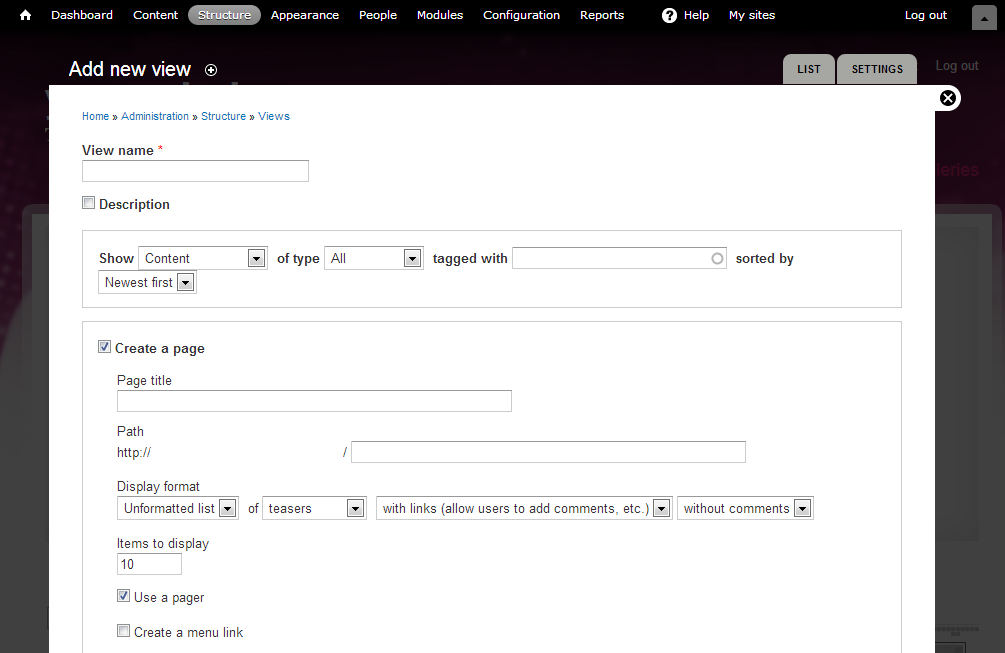
When you add a new view, you will be faced with a form that you’re required to fill.

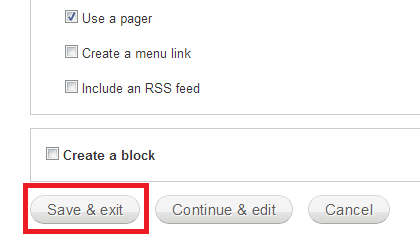
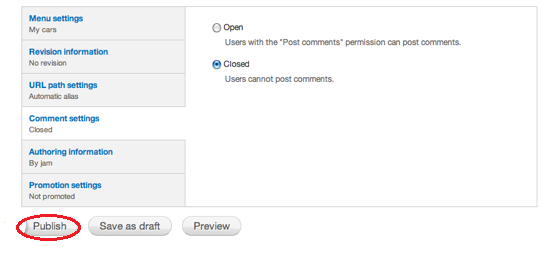
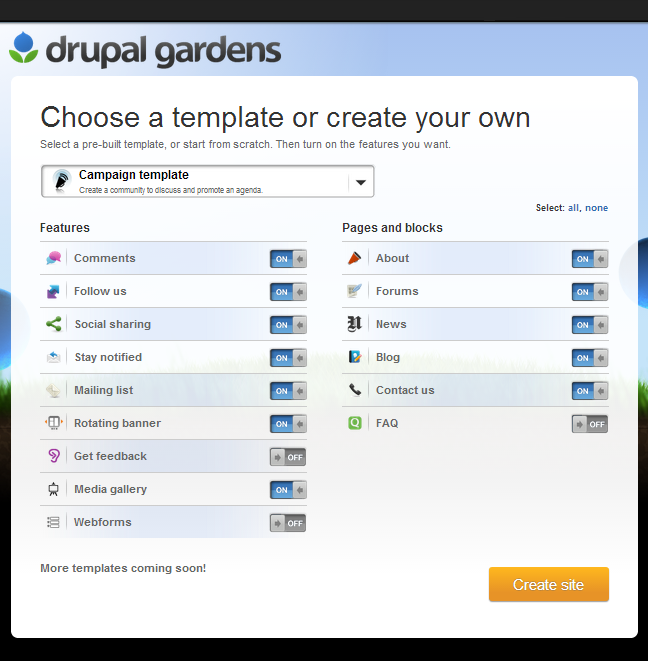
The first field requires you to name the field which is a mandatory requirement. Set the content type and select the checkbox next to ‘Create a page’. The page title and path will be entered according to the content that you are writing. At this point you can keep the formatting settings at default and proceed to the ‘Create a Menu Link’ option.

How to configure views on Drupal

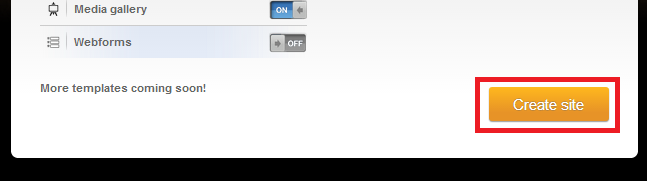
When all the fields have been filled and settings configured, proceed to the bottom of the page and select the ‘Save and Exit’ button.

How to configure views on Drupal

Configuring your email with site URL via cPanel on your Outlook

Outlook recently revealed its new features which allow you to configure any email with your outlook and access it without the need to access its online interface. This means you can even use outlook for business on your own domain. This is especially helpful for businesses since outlook provides this feature for free as compared to other email clients such as Google Apps for Business. Setting up your own email o Outlook using cPanel is incredibly easy.

Click o the File tab in the toolbar on top and click on Info. Click on Add Account in the right panel.

Configuring your email with site URL via cPanel on your Outlook

This will open up the wizard which will guide you through the next steps of the process. You will be required to provide information in order to proceed with the setup. This information includes details such as the type of account, name, email and password.

Select Email account and fill in the rest of the information. The password will be required twice.

Configuring your email with site URL via cPanel on your Outlook

Click ‘Next’. If you have provided accurate information, you’ll see a success notification. Alternatively, it will show an error message in case of incorrect information. Click ‘Next’ for the next step and select ‘manually configure server settings’. The wizard will guide you through a similar series of prompts in this case.

After you see the success message, move onto the next window and select ‘Internet Email’.

Configuring your email with site URL via cPanel on your Outlook

Clicking next will lead you to another form. In User information, type your name and email address in the relevant fields. In account type, you can choose between POP3 and IMAP. Type the ‘domainname.com’ in the incoming mail server and the same for outgoing.

Enter your complete email address in the username field followed by the password in the next field. The ‘Remember Password’ option will automatically sign you in without having to log in each time. The last checkbox should remain unchecked.

Configuring your email with site URL via cPanel on your Outlook

Click on more settings. In the new window, select the ‘Outgoing Server’ tab and check the first box that says, ‘My Outgoing server (SMTP) requires authentication’. Make sure to highlight the bullet ‘Use same settings as my incoming mail server.’

Configuring your email with site URL via cPanel on your Outlook

Click on the advanced tab and check whether the ‘Outgoing Server (SMTP)’ port number is at 2525. Click OK. You should see a congratulations page. Clicking Finish will configure your email successfully.

How to Install Drupal Modules

Once you have installed Drupal and are ready to start your own blog or site, you will need to customize it according to your preferences. In order to make it look like a professional site, a number of features will need to be added. This can be done through the easy ‘modules’ option in Drupal. Although Drupal comes with preinstalled modules, there are some features that you may want to add to provide authenticity to your blog or site. Once installed, these modules may be disabled or enable according to your will.

Navigate to modules

Make sure you are signed in as an admin on your Drupal site. The toolbar at the top should display a number of options. Locate ‘Modules’ from among them and click on it.

How to Install Drupal Modules

Clicking on ‘modules’ will lead to a page where you will be able to view a list of pre-installed modules. The checkboxes next to the modules will allow you to select any particular module and enable or disable it.

How to Install Drupal Modules

In order to save the changes made to the enabled or disabled module click the button at the bottom of the page, ‘Save Configuration’.

How to Install Drupal Modules

Installing Modules

In order to add modules that are not shown in the list, you will need to install them. The very first line of the page will contain blue hyperlinked text stating, ‘contributed modules’. Clicking on the link will lead you to a page where you can search for any particular module from a database of contributed modules.

How to Install Drupal Modules

Enter the Search criteria in the form shown below in order to reach the desired module.

How to Install Drupal Modules

Once you’ve found the module that you wish to install, download the zip file from the modules directory of Drupal. The file will then be saved onto your computer.

How to Install Drupal Modules

Return to the Modules page on Drupal and click on the ‘Install New Module’ option.

How to Install Drupal Modules

The new module can either be installed using a URL or by locating the zipped file that was downloaded earlier. Once the file has been located, click the ‘Install’ button displayed at the bottom of the page.

How to Install Drupal Modules

Congratulations! You’ve successfully installed a module to Drupal. Make sure to regularly check the module for updates by clicking on the ‘available updates’ option. Modules can also be uninstalled at any time simply by clicking on the panel at the far right of the page.

Enhanced by Zemanta

Installing Drupal Themes

One of the most popular Content Management Systems (CMS), Drupal provides flexibility and versatility to users who have no specific knowledge when it comes to blog or sit creation, enabling them o make professional looking pages in no time. This ability and user friendliness is what attributes to the rise in the success of Drupal.

Once you’ve created a blog on Drupal, it would be looking a little forlorn with the default blue and white colors of the site. In order to customize it, you will need to install a theme according to your preferences and the nature of the content that you will be uploading to the page.

Locate themes

You can search for a theme in Drupal’s own directory where a multitude of themes have been installed. You can either browse through or select the theme that you prefer or enter a search query according to your requirements.

Installing Drupal Themes

Once you’ve selected the theme that you would like to install onto your Drupal blog, click on the zip file to download it to a location onto your computer.

Installing Drupal Themes

Make sure that the version is compatible with the Drupal version that you are using.

Log In as Admin

Once you have obtained the file for the theme that you are going to install, you need to up-load it to Drupal in order to apply it to the blog. Log in to your Drupal site as admin and click on the Dashboard. Click on ‘Appearance’ and then on ‘Install new themes’.

At this point you will be prompted to either provide a URL linking to the desired theme or to upload a file. Since we’ve downloaded a theme to the computer, we’ll select the second option. Click Browse to locate the file and click the Install button at the bottom of the page.

Installing Drupal Themes

Enable the Theme

Once installed, a message will be displayed on screen notifying you of the successful installation of the theme. The next two steps will also be outlined within the window.

Installing Drupal Themes

Visit the ‘themes’ page on your dashboard and locate the Disabled themes. The recently installed theme should now show within the list

Installing Drupal Themes

Click the Enable and Set Default link in order to apply the theme to the blog.

Drupal is highly flexible an easy to use when it comes to customization. With this feature you can change the look of your blog whenever you choose. You can always disable the theme; install a new one or even enable a previously installed theme.

Enhanced by Zemanta

Posting Content on Drupal

Once you’ve created a blog using Drupal and customized it according to a particular theme, you need to add content to it in order to drive traffic towards your blog. Content is the most important aspect of any blog, site or page. The importance of content has also been realized by marketers who try to create compelling and engaging content that will drive customers towards their site. Even if you are a personal blogger, the motive of your blog would be to get your thought to a certain audience. This audience can only be gathered by posting quality content.

Add a Page

Make sure that you are signed in as an administrator on your Drupal blog. On the main page, under the dashboard you will see a button stating, ‘Add Content’.

Posting Content on Drupal

A display window will then pop up prompting you to select between two options. You will be asked to either create an article or a basic page.

Posting Content on Drupal

Although the choice of content depends solely upon you and what you have to say, it’s best to create a basic page for your very first entry. This is because the site does not have any basic structure as yet which will have to be created from scratch. The procedure however is much easier than it sounds.

The article option is more suitable for an update which may pertain to a blog post, news item or other time-sensitive information. A basic page on the other hand will allow you to create a static page similar to a webpage.

Adding Text

The text that is usually entered onto a page consists of the title and a description or an article. The WYSIWYG (What you see is what you get) editor in Drupal allows you to format the content as you create it. This is different from HTML formatting where you’re required to enter plain unformatted text.

Posting Content on Drupal

Add Images and Video

In order to customize the article or description that you enter into the page using an image or video, you can simply add it within the WYSIWYG editor. This can be done by clicking on the Add Media option.

Posting Content on Drupal

When adding media to your content, you can either select and upload a file from your computer, paste a link to one on a website or select one form Drupal’s image library. If you’re uploading a file from the computer, you will be required to establish the pathway to the file by clicking the Browse button next to the field. Once the image has been selected click Upload to add the image to your content.

Posting Content on Drupal

Publish the Page

If you’re satisfied with the content that you have entered onto the page, then you can publish it for display on the website. Alternatively, you may even save a work in progress as a Draft and continue to work on it later. In order to publish the page, you can simply click on the Publish button at the bottom of the options window.

Posting Content on Drupal

Enhanced by Zemanta

Starting a Blog on Drupal gardens: A Step-by-Step Guide

Drupal has already established itself as a popular and effective content management system which allows you to create your own websites and blogs. Recently they unveiled their new Drupal Gardens which not only sported a very different look but also featured some very different features. Drupal Gardens was introduced in order to cater to the needs of bloggers who were not aware of the technical aspects of blogging. With pre-installed modules, creating a Drupal Gardens blog is a simple step by step procedure.

Step 1: Visit Drupal Gardens

The very first step to begin creating your own blog on Drupal Gardens is to visit the main page of the site. When you visit DrupalGardens.com you will be greeted by the landing page which looks like the one displayed below.

Starting a Blog on Drupal gardens: A Step-by-Step Guide

If you already have an account you can simply proceed by clicking the yellow button which says create a free site. In case you don’t have a pre-existing account, you will have to click the Sign Up button as shown above.

Step 2: Fill the Sign-up form

Once you’ve clicked the Sign-Up button, you will be redirected to the form which will ask for your basic information and verify whether or not you are an automated program.

Starting a Blog on Drupal gardens: A Step-by-Step Guide

You will notice that the very first field asks for the preferred URL for your website. This is followed by the domain name ‘.drupalgardens.com’. This is because your website will be hosted on the Drupal gardens server and will be a sub domain of Drupal Gardens. You can remove the domain name and have an exclusive URL by purchasing your own.

Step 3: Choose your Template

At this point you will be asked about the features that you require on your page. A list of collapsible features will be displayed that you can choose to include in or exclude from your blog. Hovering on each of the options will provide you with further details about the particular feature.

Starting a Blog on Drupal gardens: A Step-by-Step Guide

These can be modified at any time in the future. Once you’ve selected your preferred template and associated features, click the Create Site button to move on to the next step.

Starting a Blog on Drupal gardens: A Step-by-Step Guide

Step 4: Verify Your Email

Drupal Gardens will require verification from your email address about the site that you are creating.

 Starting a Blog on Drupal gardens: A Step-by-Step Guide

At this point you will have to head over to the email account that was provided at the time of Sign-Up. Drupal gardens will have sent two verification emails. The first one will be an account verification email for the site that you have created. Click on that to move further with the site creation process.

Starting a Blog on Drupal gardens: A Step-by-Step Guide

Starting a Blog on Drupal gardens: A Step-by-Step Guide

Clicking on the link will directly lead you to a page which will confirm that the verification process has been complete and that your site has been created. The URL of the site will be displayed below.

Starting a Blog on Drupal gardens: A Step-by-Step Guide

If you were wondering what the other email referred to, here is the snapshot below.

Starting a Blog on Drupal gardens: A Step-by-Step Guide

Step 5: Start Customizing

Clicking on the URL once your account has been verified will lead you directly to the administrator page of your Drupal Gardens blog where you can start modifying your Drupal Blog. You can make changes and add or remove authors by visiting the dashboard.

Manually install Drupal on your hosting account

On this page we will learn to manually install Drupal on your hosting account.

 STEP 1

Download the latest Drupal version – The latest version of Drupal currently is 7.xx.  One can use the currently stable versions for Drupal 6.xx and 7.xx from the Drupal’s Download page.  Go to this page  Download the latest copy of Drupal from Drupal site.

Drupaldownload

Save it on your computer’s drive so it is easily accessible when you need to upload it.

Extract the tar.gz file.  This will create a folder in your download folder on your computer.  We will later take the contents of this folder and upload that on the hosting site.

STEP 2

Now we need to create a new database.  Please follow the steps on this page – Set up a New Database from the Cpanel.

STEP 3

In this we need to upload the Drupal code file to the Hosting site.  We will use Filezilla to move the contents of the folder on the computer with Drupal files to public_html folder on the hosting site.  This is the root director on the hosting site. (Using Filezilla to move files from your computer to the hosting site)

STEP 4
Preparing the filesystem – In the File Manager on the cpanel, you will need to navigate to /public_html/sites/default/ and copy default.settings.php into a new file settings.php. Also change the permissions of this file to 666. In addition set the permissions of /public_html/sites/default/ to 777. This will allow Drupal to create the files folder as owned by Apache user itself. Remember to set this back to 755 once installation is done.


STEP 5

Drupal Installation – Once the files are moved to the webroot you can install Drupal by accessing the domain corresponding to your hosting account from a browser. Drupal Installer will guide you through the rest of the installation, as it will detect the installation files from the root directory, public_html.  Through this process, you will have to enter the database details that were used when we created the database earlier.  During this process you will need to input more information such as your site name, webmasters email id etc

Navigate to the URL of your Drupal site and run the install.php file (for example http://yourdomainname.com/install.php). Pick the default profile option for your Drupal application.

Drupalinstallation1


Pick English as the default language from the next screen.

Drupalinstallation2


In the next screen, you need to enter the database details we had used to create the database earlier.

Drupalinstallation3


With this, the basic installation process is completed, and the basic site details are left.

Drupalinstallation4


This completes the site installation.  Now you are ready to use your Drupal site.  You will need to customize it with the installation of various modules and installing themes, as well as configuring them as per your taste.


.