Fantastico is one of the most popular script installers available today that can be used in order to install WordPress software onto your hosting account. Fantastico normally appears as an add-on to cPanel as an extra service. cPanel itself is an essential tool for bloggers especially if they are serious about their blogging career. It gives access to a host of technical features
Step 1: Log in to cPanel
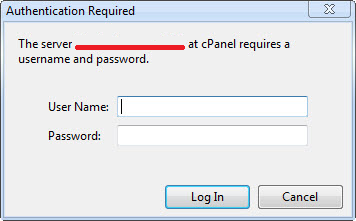
The very first step that you need to take in order to access fantastic is to log in to cPanel. When logging in, you will be asked to provide a username and password. The username will typically be a domain name followed by a forward slash and cPanel e.g. “abcd.com/cpanel”.
At this point you will have gained access to the cPanel main page as shown below. There will be a large number of options available out of which you will have to locate Fantastico.

Step 2: Locate Fantastico
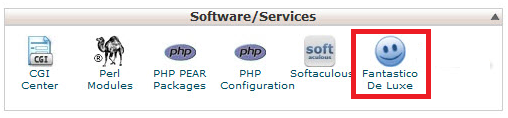
You will have to scroll down until you reach the Software/Service panel in which you will see the Fantastico icon.
Step 3: Access WordPress
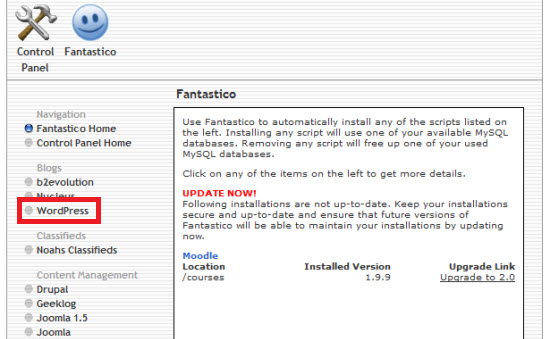
Once you’ve clicked on the fantastic option you will see a new panel which would display details about the current version of Fantastico. On the left panel however, you will be able to view a number f software available on Fantastico. Locate and Click on WordPress.
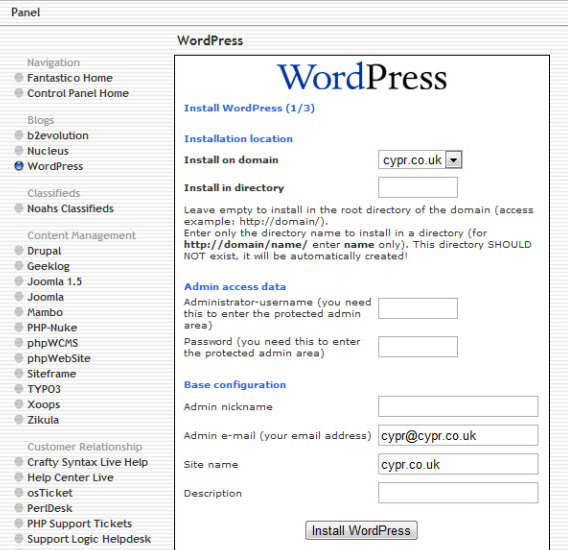
Step 4: Installing WordPress (1/3)
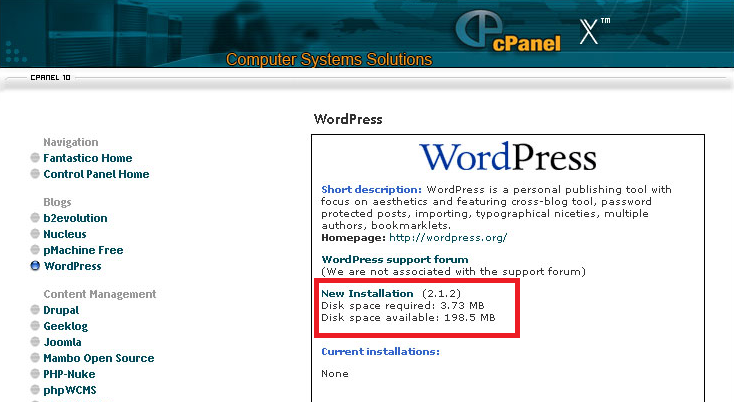
Once you’ve clicked WordPress you will begin the installation process. This installation will be a three step process. The first window will ask whether you want to create a new installation. Click on “New Installation” to proceed to the next step of the installation process.
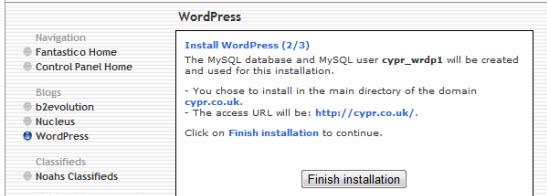
Step 5: Installing WordPress (2/3)
Once you’ve clicked on ‘New Installation’, a form will be displayed asking for further information about the blog. The data required would typically ask for the following information;
Install in Domain
This will include the domain in which the blog will be installed. This is where you will designate the location of the WordPress installation.
Install in Directory
If this field is left empty, fantastic will automatically install WordPress in the root directory such as http://abcdomain.com. If you define the directory in which WordPress will be installed into the name will be displayed as “http://abcdomain.com/wordpress”.
Admin Access Data
This is simply the login information that the admin will use to sign in to WordPress. You will be required to fill in a username and a password.
Admin Nickname
The admin nickname will be the alias that will be displayed on the site as the post author.
Admin Email
You will be asked to link an email address to the blog. The email address is taken as a precautionary measure in case you forget your username or password. This is where you will be asked to refresh your password or change it in case you forget it.
Site Name
This will be the name of your blog and will be displayed in the Header of your Blog.
Description
This will be the Tagline of the blog which will be displayed immediately below the title header.
Once you’ve finished filling in the form, you can proceed towards the last step by clicking the “Install WordPress” button.
Step 6: Installing WordPress (3/3)
Once you’ve clicked the ‘Install WordPress’ button, you will be able to view a window which will be the final step of the process. This window will simply contain details of the created blog. The blog will be activated when you click the ‘Finish Installation’ button.
Congratulations! You have now installed WordPress using Fantastico. In order to access the blog and customize it, you will have to log in to WordPress and make modifications.