Although a relatively simple task, beginners often find themselves at a loss when it comes to installing plug-ins on their WordPress blog. Plug-ins are highly essential for the success of any blog and can become great tools which help the blog owner to manage and run the blog and provide links and other features which would normally entail a working knowledge of HTML. There are three ways in which you can install WordPress plug-ins which will be described below.
Method 1: Automatic Installation
This is the easiest method of installing WordPress plug-ins onto your blog. WordPress has a directory of pre-installed plug-ins which you can choose from for use on your blog. The directory however is often limited and more ambitious bloggers use other installation methods to get customer results.
In order to automatically install a WordPress plug-in you need to be logged in to your wodpress.org account. Access the dashboard and hover over the appearance panel to reveal the Appearance option. Under the appearance option you will have a “Plug-Ins” option followed by “Add New”.
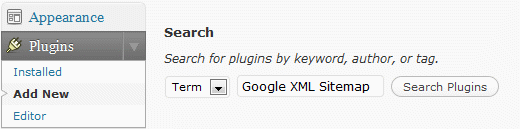
In the search box you can type the kind of plug-in that you require or the name of the particular plug-in that you want to install. This will show you multiple results from which you can choose the plug-in you prefer.
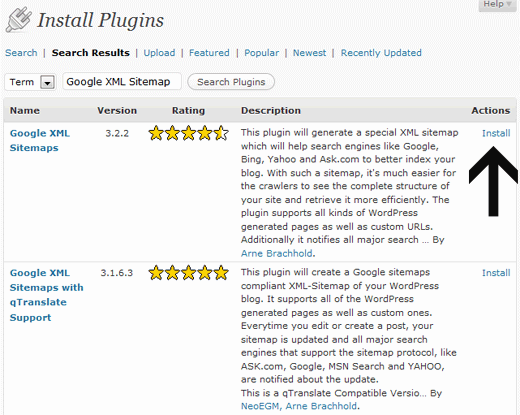
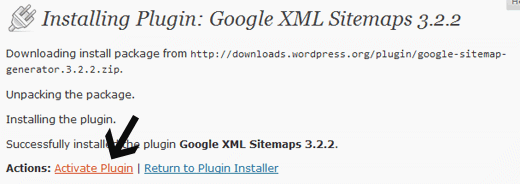
When you click the preferred plug-in, a light box will appear on the screen where you will be able to see further details of the plug-in and an “Install” button on the right.
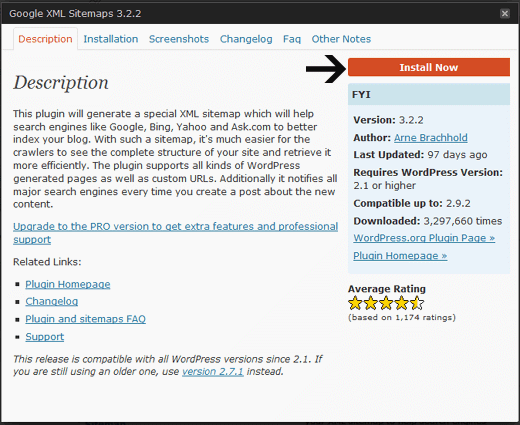
Once you’ve installed the plug-in you will be prompted to activate it. The install button will redirect you to the activation page as shown below.

Method 2: Uploading Plug-ins
Chances are that the plug-in that you require was not present in the WordPress directory. This means that the pug-in would be obtained from a third party. The first step would be to obtain the plug-in file from the source which may be another website or internet directory. This will typically be a .zip file. Go to the admin panel on your WordPress blog and follow the same steps as above and click “Add New”. This time however select the ‘Upload’ tab.
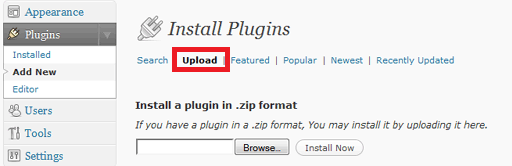
To upload the file, select the browse button that can be seen above and simply select the zipped file that you obtained from the source.

Once you’ve selected the file, you will need to click the ‘Install Now’ button. This will redirect you to a similar activation page as the ut0omatic installation.
Now that you have activated the plug-in it will be added to your blog and can be configured according to your preferences.
Method 3: Using the FTP Manager
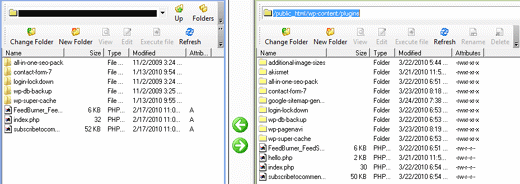
Something that the beginners should avoid at all costs, using the FTP manager to install a WordPress plug-in is a method for the more experienced blogger. The first step is to access the host via the FTP (File Transfer Protocol) manager. Access the path (/wp-content/plugins/) and install the files in that location. You can also drag and drop the files in the destination folder. You must make sure however that files are unzipped.
When you visit the admin tab in the WordPress blog, the plug-in would be there already. You will now be required to simply activate the plug-in and the process will be complete.
