Adding Content to a WordPress Blog

Once you’ve created your WordPress blog, you will need to add content to it. Chances are you have something brilliant to share with the world but just don’t know how to add it to your WordPress blog in a compelling, engaging and accurate way. Although uploading to WordPress may seem complicated at first, it’s like snapping your fingers once you get the hang of it.

Content that is posted to WordPress may be in the form of text, links, images or video. To get started, you will need to know how to access posts in the dashboard in order to create a new one.
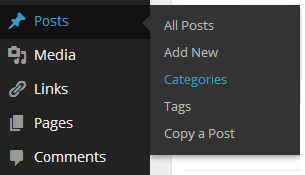
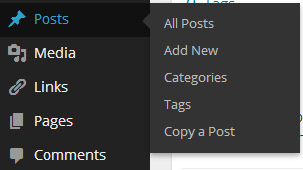
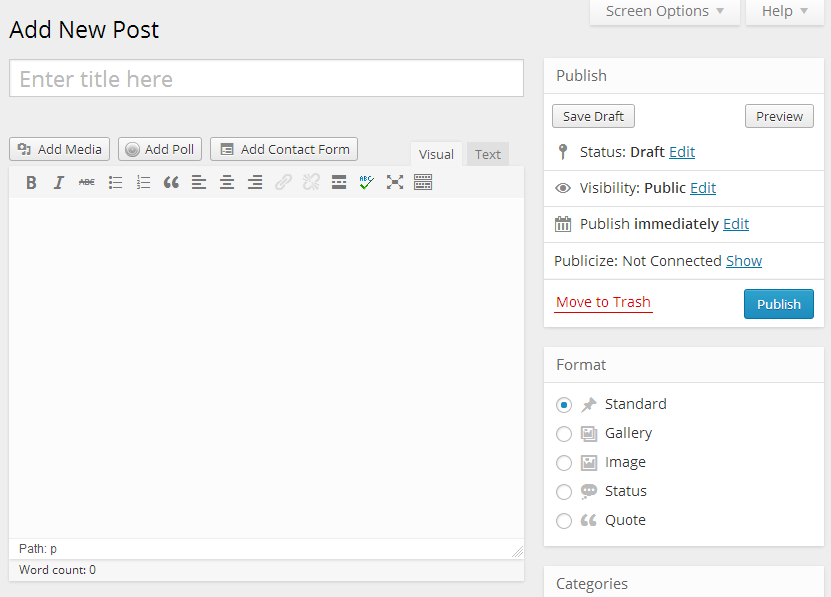
Add a New Post

Once you’re logged in as the administrator of your WordPress blog, you will be able to view the dashboard panel on the left. At this point, you may either decide to create a new page or a post. A post will simply be added to the page that you have selected. If you run a traditional blog, it will in a linear fashion and posts will simply be added above the previous post on a single page. In order to add a new post hover over the posts option in order to reveal a menu. Click on Add New to create new post.

Adding Content to a WordPress Blog

Edit the Post

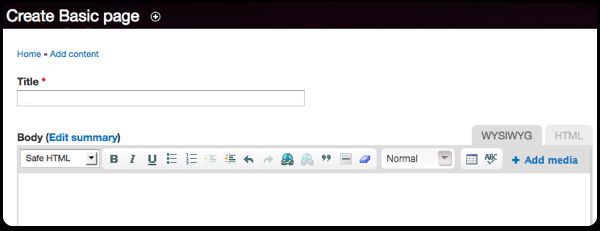
WordPress has a WYSIWG editor which means that the manner in which you format within the editor will be the final product that will be displayed on the blog. You can also simply copy text from an Ms Word document into the editor.
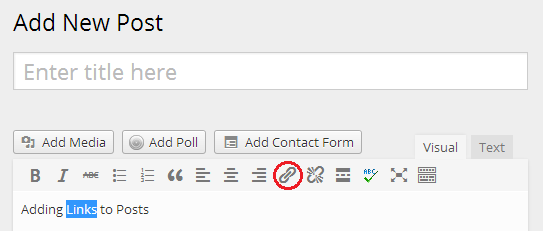
Adding Content to a WordPress Blog

Links

Links can be added to posts within the editor. Make note that the link option does not become visible until you have highlighted the text to be hyperlinked.

Adding Content to a WordPress Blog

The next screen will ask for the URL that the text will create a path to along with a title. Click on Add Link in order to create a link within your blog post.

Adding Content to a WordPress Blog

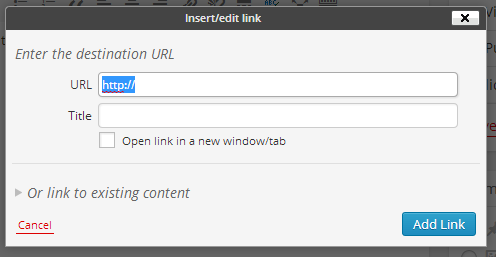
The link to existing content allows you to link to previous blog posts made to the blog.
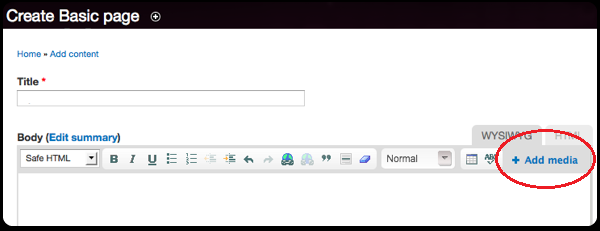
Images

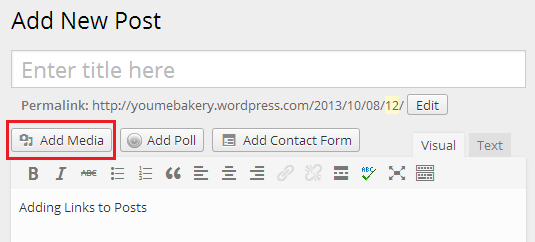
To add images to your content, click on the Add Media button. This will open up a window which will allow you to add all kinds of media into the blog post.

Adding Content to a WordPress Blog

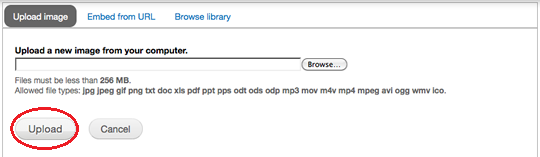
At this point, you can select from existing media that you had previously uploaded, add a link to an image on the internet or upload one from your computer.

Adding Content to a WordPress Blog

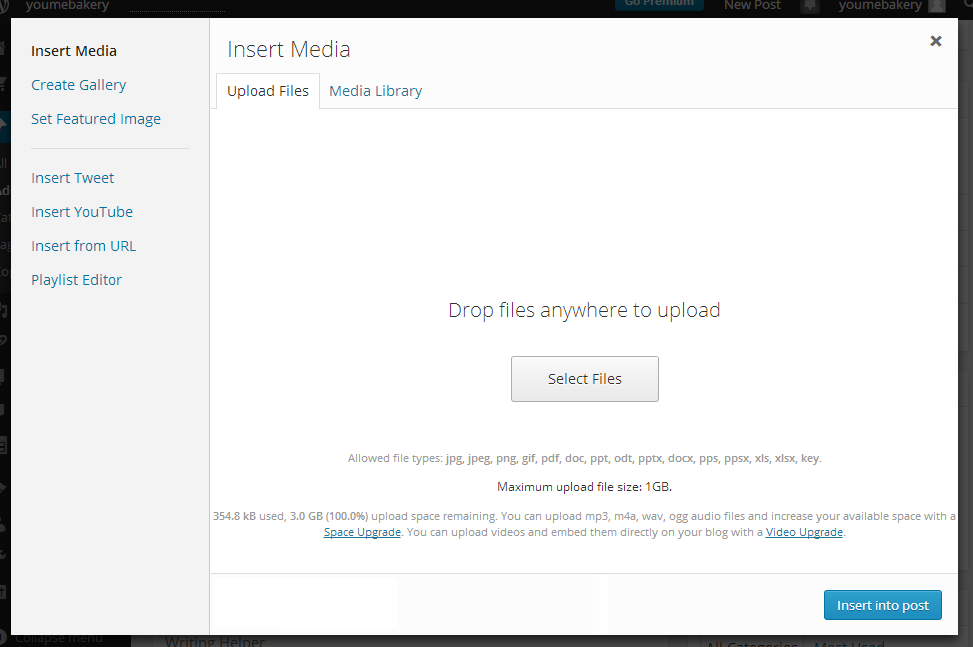
Drag and drop the files into the window or click the Select files button in order to upload them to WordPress. Once uploaded, click on Insert into Post, in order to add the image to the post.

Enhanced by Zemanta

Adding a new Category in WordPress

WordPress is the best and most versatile CMS software available today. What has contributed to the success of WordPress is the ability of amateur bloggers and website owners to create their very own custom website with complete features allowing them to provide features and options that can rival those of professional websites.

One such feature is that of adding categories to WordPress. Making a category is an extremely useful method of grouping together related posts. Categories work similar to tags but work in a much broader sense and make it easier for search engines to find your content. Categories may be displayed on your WordPress blog either at the top or the bottom, depending upon the theme that has been selected. Categories are highly effective tools to organize your content on your blog and provide it with a certain structure.

The very first step is to log in to your WordPress site as Administrator and access the dashboard.

Adding a new Category in WordPress

The most basic method of adding categories or assigning them to posts is to do it while you are creating the post. This method works best if you have been using the WordPress site for a while and already have a pre-established structure and hierarchy to your categories.

Adding a new Category in WordPress

You can even add a new category straight from the panel at the right. For existing categories, you can simply select the one which is most relevant to your post by ticking the checkbox next to it.

Adding a new Category in WordPress

In case you have uploaded multiple posts onto your blog or site and neglected to categorize it, you can do so at a later date. In this case, you will have to access categories through the dashboard. Hover over the Posts options to reveal a menu which will contain the Categories option.

Adding a new Category in WordPress

Clicking on Categories will lead you to a page where you can add a name and description to a new category. Once you have completed the required information, you will click on the blue Add New Category button. Existing categories will be displayed in a panel on the right of the page.

Adding a new Category in WordPress

You can always manage categories from the panel on the right. Hovering over the category will display multiple actions that you can take on the category. You can edit, delete or view the category in question.

Adding a new Category in WordPress

Clicking on Edit will lead you to another page where you can modify the specifics of the category. Changes to the category will be applied throughout every post that you have added to the category.

Adding a new Category in WordPress

Enhanced by Zemanta

Posting Content on Drupal

Once you’ve created a blog using Drupal and customized it according to a particular theme, you need to add content to it in order to drive traffic towards your blog. Content is the most important aspect of any blog, site or page. The importance of content has also been realized by marketers who try to create compelling and engaging content that will drive customers towards their site. Even if you are a personal blogger, the motive of your blog would be to get your thought to a certain audience. This audience can only be gathered by posting quality content.

Add a Page

Make sure that you are signed in as an administrator on your Drupal blog. On the main page, under the dashboard you will see a button stating, ‘Add Content’.

Posting Content on Drupal

A display window will then pop up prompting you to select between two options. You will be asked to either create an article or a basic page.

Posting Content on Drupal

Although the choice of content depends solely upon you and what you have to say, it’s best to create a basic page for your very first entry. This is because the site does not have any basic structure as yet which will have to be created from scratch. The procedure however is much easier than it sounds.

The article option is more suitable for an update which may pertain to a blog post, news item or other time-sensitive information. A basic page on the other hand will allow you to create a static page similar to a webpage.

Adding Text

The text that is usually entered onto a page consists of the title and a description or an article. The WYSIWYG (What you see is what you get) editor in Drupal allows you to format the content as you create it. This is different from HTML formatting where you’re required to enter plain unformatted text.

Posting Content on Drupal

Add Images and Video

In order to customize the article or description that you enter into the page using an image or video, you can simply add it within the WYSIWYG editor. This can be done by clicking on the Add Media option.

Posting Content on Drupal

When adding media to your content, you can either select and upload a file from your computer, paste a link to one on a website or select one form Drupal’s image library. If you’re uploading a file from the computer, you will be required to establish the pathway to the file by clicking the Browse button next to the field. Once the image has been selected click Upload to add the image to your content.

Posting Content on Drupal

Publish the Page

If you’re satisfied with the content that you have entered onto the page, then you can publish it for display on the website. Alternatively, you may even save a work in progress as a Draft and continue to work on it later. In order to publish the page, you can simply click on the Publish button at the bottom of the options window.

Posting Content on Drupal

Enhanced by Zemanta