How to Install Drupal Modules

Once you have installed Drupal and are ready to start your own blog or site, you will need to customize it according to your preferences. In order to make it look like a professional site, a number of features will need to be added. This can be done through the easy ‘modules’ option in Drupal. Although Drupal comes with preinstalled modules, there are some features that you may want to add to provide authenticity to your blog or site. Once installed, these modules may be disabled or enable according to your will.

Navigate to modules

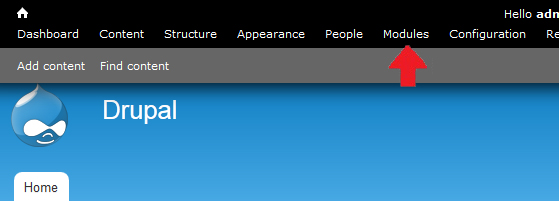
Make sure you are signed in as an admin on your Drupal site. The toolbar at the top should display a number of options. Locate ‘Modules’ from among them and click on it.

How to Install Drupal Modules

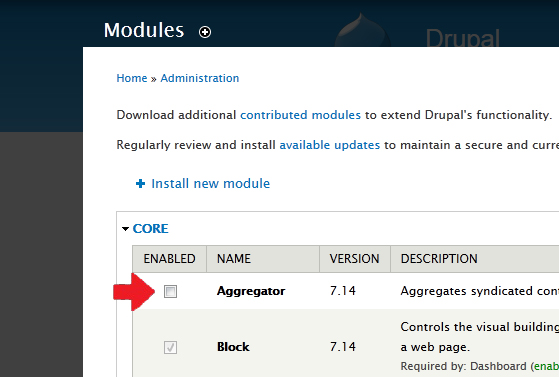
Clicking on ‘modules’ will lead to a page where you will be able to view a list of pre-installed modules. The checkboxes next to the modules will allow you to select any particular module and enable or disable it.

How to Install Drupal Modules

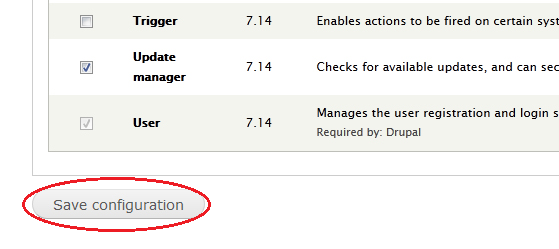
In order to save the changes made to the enabled or disabled module click the button at the bottom of the page, ‘Save Configuration’.

How to Install Drupal Modules

Installing Modules

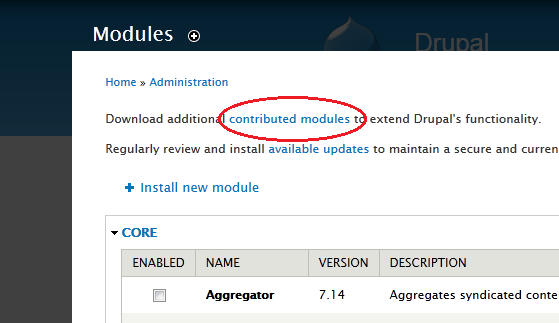
In order to add modules that are not shown in the list, you will need to install them. The very first line of the page will contain blue hyperlinked text stating, ‘contributed modules’. Clicking on the link will lead you to a page where you can search for any particular module from a database of contributed modules.

How to Install Drupal Modules

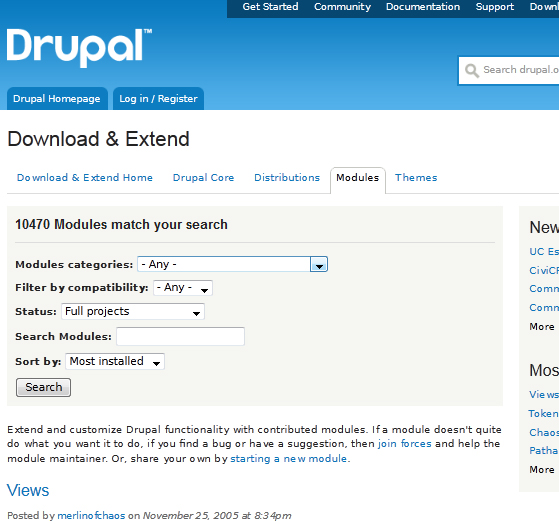
Enter the Search criteria in the form shown below in order to reach the desired module.

How to Install Drupal Modules

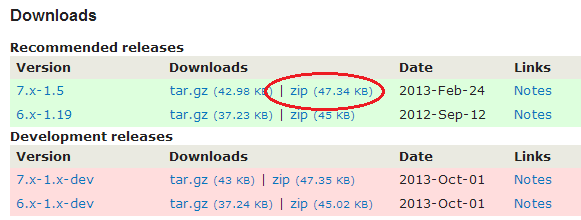
Once you’ve found the module that you wish to install, download the zip file from the modules directory of Drupal. The file will then be saved onto your computer.

How to Install Drupal Modules

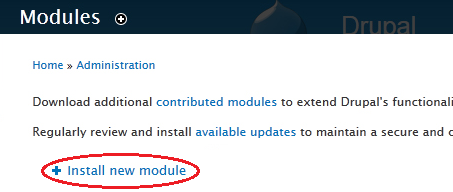
Return to the Modules page on Drupal and click on the ‘Install New Module’ option.

How to Install Drupal Modules

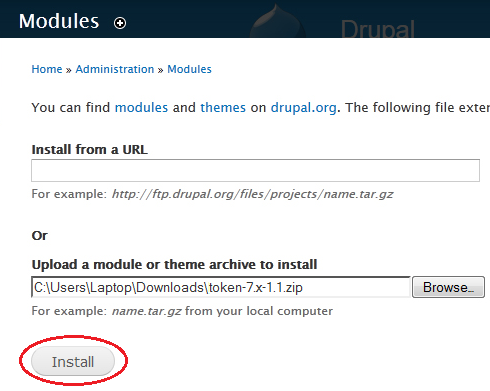
The new module can either be installed using a URL or by locating the zipped file that was downloaded earlier. Once the file has been located, click the ‘Install’ button displayed at the bottom of the page.

How to Install Drupal Modules

Congratulations! You’ve successfully installed a module to Drupal. Make sure to regularly check the module for updates by clicking on the ‘available updates’ option. Modules can also be uninstalled at any time simply by clicking on the panel at the far right of the page.
Enhanced by Zemanta

Installing Drupal Themes

One of the most popular Content Management Systems (CMS), Drupal provides flexibility and versatility to users who have no specific knowledge when it comes to blog or sit creation, enabling them o make professional looking pages in no time. This ability and user friendliness is what attributes to the rise in the success of Drupal.

Once you’ve created a blog on Drupal, it would be looking a little forlorn with the default blue and white colors of the site. In order to customize it, you will need to install a theme according to your preferences and the nature of the content that you will be uploading to the page.

Locate themes

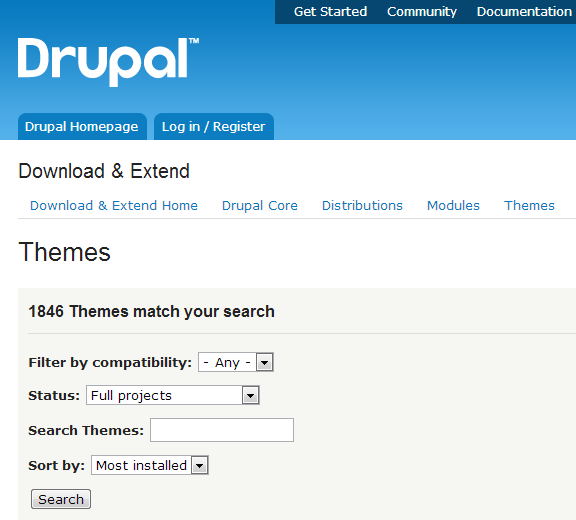
You can search for a theme in Drupal’s own directory where a multitude of themes have been installed. You can either browse through or select the theme that you prefer or enter a search query according to your requirements.

Installing Drupal Themes

Once you’ve selected the theme that you would like to install onto your Drupal blog, click on the zip file to download it to a location onto your computer.

Installing Drupal Themes

Make sure that the version is compatible with the Drupal version that you are using.

Log In as Admin

Once you have obtained the file for the theme that you are going to install, you need to up-load it to Drupal in order to apply it to the blog. Log in to your Drupal site as admin and click on the Dashboard. Click on ‘Appearance’ and then on ‘Install new themes’.

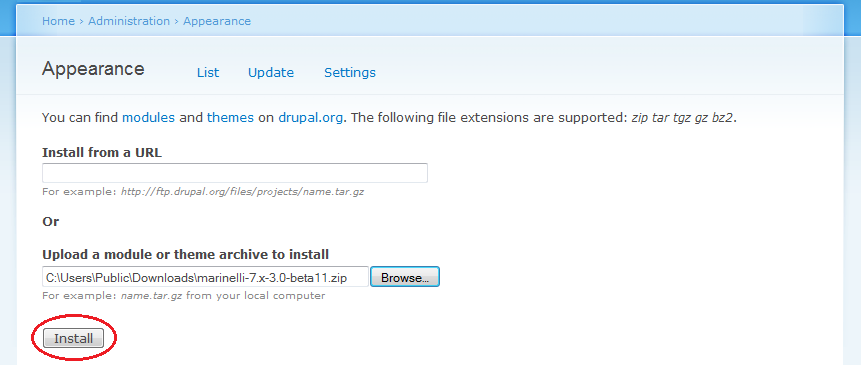
At this point you will be prompted to either provide a URL linking to the desired theme or to upload a file. Since we’ve downloaded a theme to the computer, we’ll select the second option. Click Browse to locate the file and click the Install button at the bottom of the page.

Installing Drupal Themes

Enable the Theme

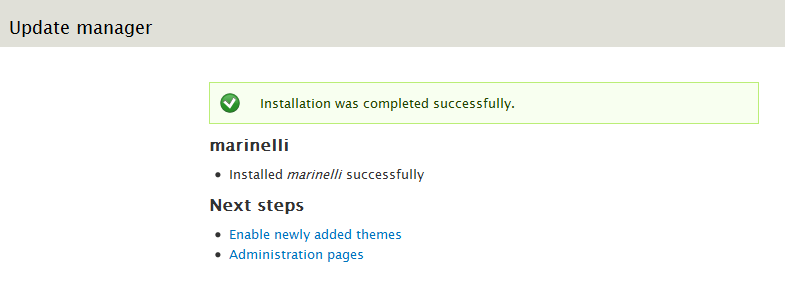
Once installed, a message will be displayed on screen notifying you of the successful installation of the theme. The next two steps will also be outlined within the window.

Installing Drupal Themes

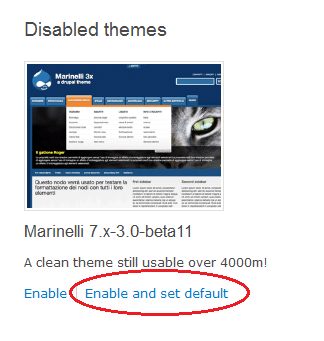
Visit the ‘themes’ page on your dashboard and locate the Disabled themes. The recently installed theme should now show within the list

Installing Drupal Themes

Click the Enable and Set Default link in order to apply the theme to the blog.

Drupal is highly flexible an easy to use when it comes to customization. With this feature you can change the look of your blog whenever you choose. You can always disable the theme; install a new one or even enable a previously installed theme.

Enhanced by Zemanta

Posting Content on Drupal

Once you’ve created a blog using Drupal and customized it according to a particular theme, you need to add content to it in order to drive traffic towards your blog. Content is the most important aspect of any blog, site or page. The importance of content has also been realized by marketers who try to create compelling and engaging content that will drive customers towards their site. Even if you are a personal blogger, the motive of your blog would be to get your thought to a certain audience. This audience can only be gathered by posting quality content.

Add a Page

Make sure that you are signed in as an administrator on your Drupal blog. On the main page, under the dashboard you will see a button stating, ‘Add Content’.

Posting Content on Drupal

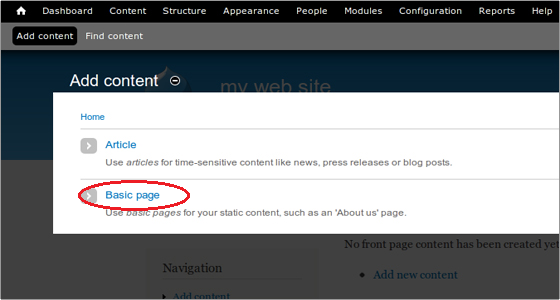
A display window will then pop up prompting you to select between two options. You will be asked to either create an article or a basic page.

Posting Content on Drupal

Although the choice of content depends solely upon you and what you have to say, it’s best to create a basic page for your very first entry. This is because the site does not have any basic structure as yet which will have to be created from scratch. The procedure however is much easier than it sounds.

The article option is more suitable for an update which may pertain to a blog post, news item or other time-sensitive information. A basic page on the other hand will allow you to create a static page similar to a webpage.

Adding Text

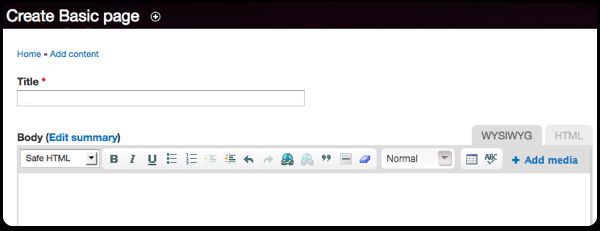
The text that is usually entered onto a page consists of the title and a description or an article. The WYSIWYG (What you see is what you get) editor in Drupal allows you to format the content as you create it. This is different from HTML formatting where you’re required to enter plain unformatted text.

Posting Content on Drupal

Add Images and Video

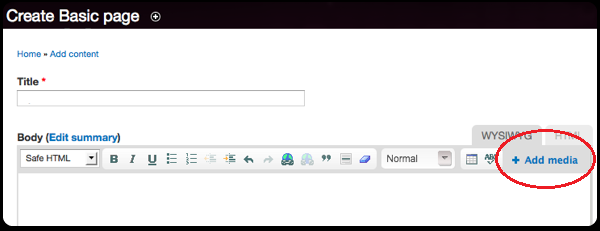
In order to customize the article or description that you enter into the page using an image or video, you can simply add it within the WYSIWYG editor. This can be done by clicking on the Add Media option.

Posting Content on Drupal

When adding media to your content, you can either select and upload a file from your computer, paste a link to one on a website or select one form Drupal’s image library. If you’re uploading a file from the computer, you will be required to establish the pathway to the file by clicking the Browse button next to the field. Once the image has been selected click Upload to add the image to your content.

Posting Content on Drupal

Publish the Page

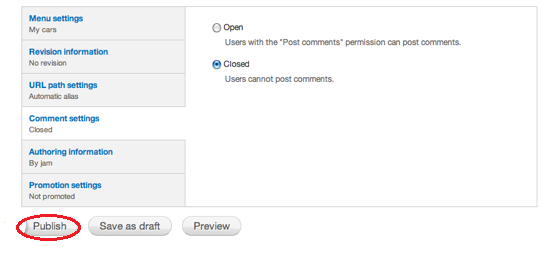
If you’re satisfied with the content that you have entered onto the page, then you can publish it for display on the website. Alternatively, you may even save a work in progress as a Draft and continue to work on it later. In order to publish the page, you can simply click on the Publish button at the bottom of the options window.

Posting Content on Drupal

Enhanced by Zemanta

Signing up for a Blog Hosting account with Bluehost

Bluehost is one of the best hosting option for bloggers out there.  It offers an updated version of the popular cpanel, with very easy interface for billing, domains handling, database handling and installation of any Blogging application like WordPress, Drupal, Joomla and many more.

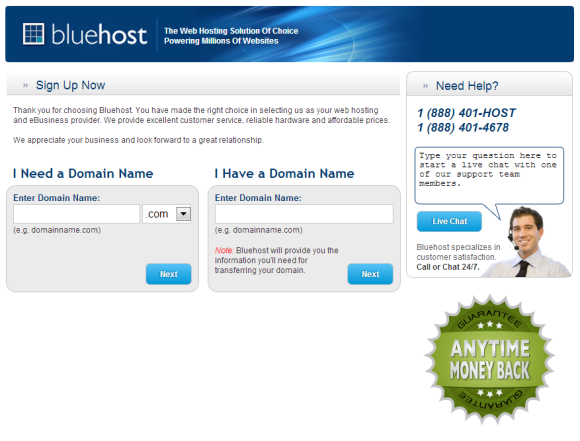
Here is where you start.  Add your information below.  It offers free domain name along with hosting, so you don’t have to spend an extra $8-10 on the domain cost as well

Bluehost1


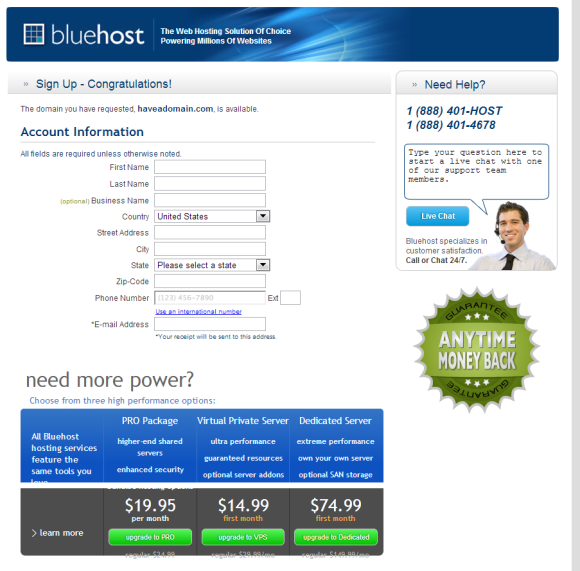
Once you have entered your desired domain name, it takes you to the registration and billing screen.  Let us look at the Registration part of the screen first.  It requires your contact information.

Bluehost2


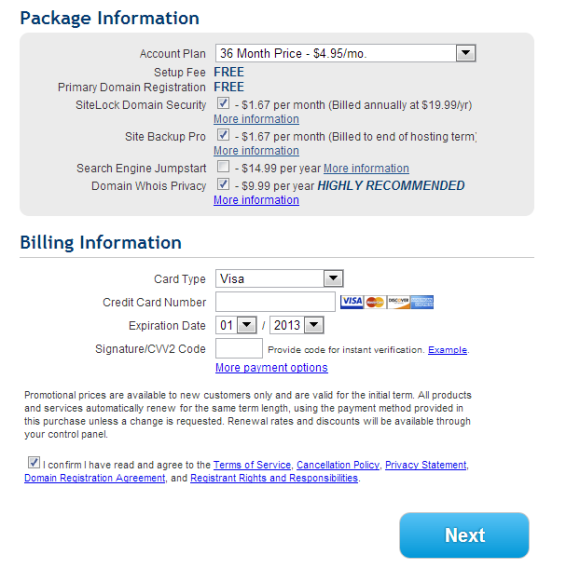
You can select any of the packages offered by Bluehost depending on what your budget is and what your plans are.  For longer durations, the cost per month is lower.

Bluehost2b


As you sign up, you are all set for the Cpanel and its use.  We will discuss the setting up of a blog and installation of various Blogging Applications on another page.

Enhanced by Zemanta